Updated By TeckWrap Craft On October 23, 2024
Do You Mirror Iron On Vinyl?
Table of Contents
- What Is Iron On Vinyl?
- Which Side Do You Cut On Iron On Vinyl?
- Projects To Make With A Heat Transfer Vinyl
- Step By Step Guide On How To Print Heat Transfer Vinyl On A Garment
- Supplies Needed
- Step 1: Prepare the Cut File
- Step 2: Scale The Design
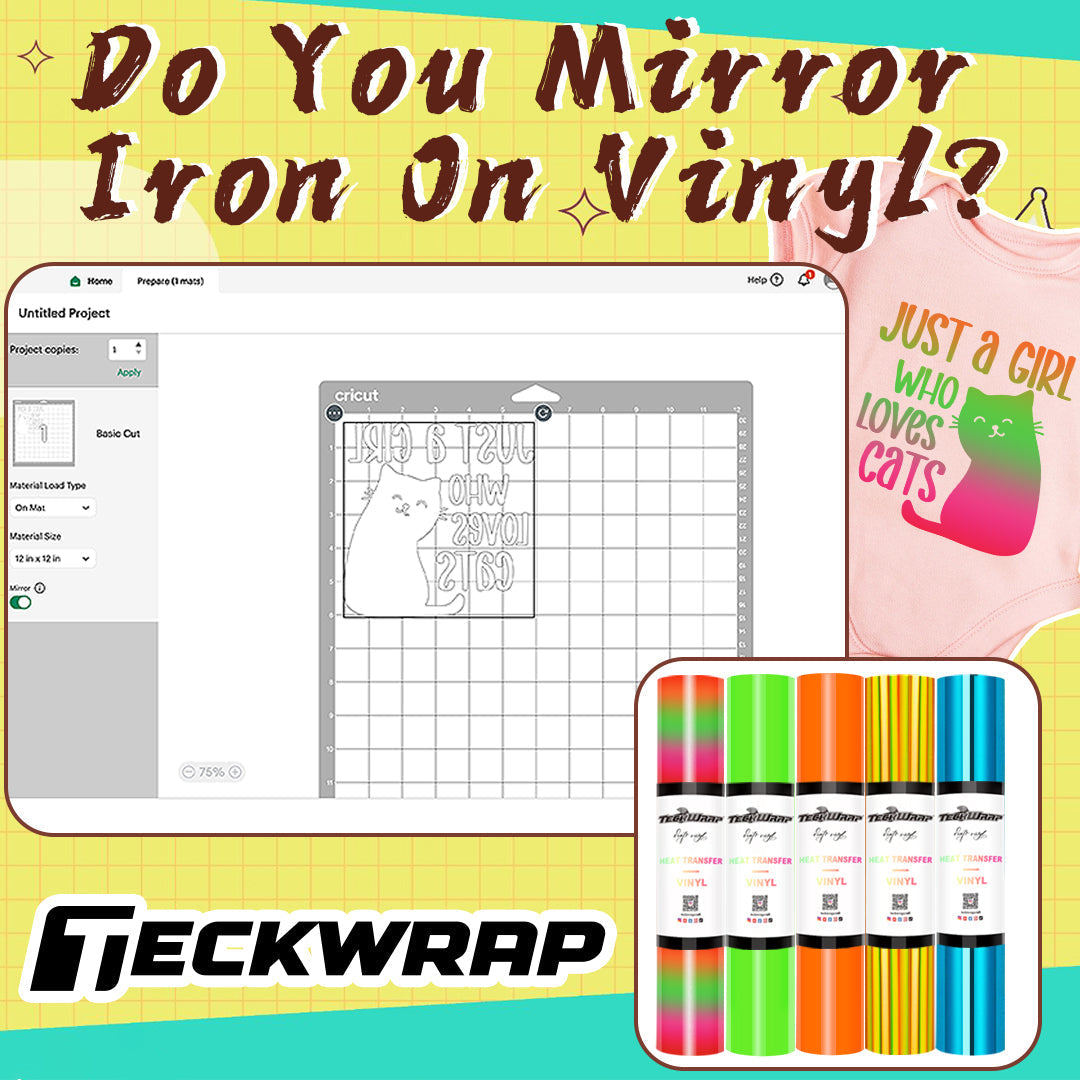
- Step 3: Mirror The Design
- Step 4: Place Heat Transfer On The Cutting Mat
- Step 5: Adjust The Cut Settings
- Step 6: Test Cut And Get Ready To Cut Iron On Vinyl!
- Step 7: Weed Out Excess Vinyl
- Step 8: Iron Or Heat Transfer The Vinyl To The Garment
- TeckWrap Craft Heat Transfer Vinyl Heat And Time Guide
- Cold Peel vs Warm Peel vs Hot Peel Heat Transer Vinyl
- Tips When Printing Heat Transfer Vinyl
- Frequently Asked Questions
Whether you call it iron-on or heat transfer vinyl, you may ask: Do you mirror iron-on vinyl? Yes, you should mirror the design when using heat transfer vinyl. Regardless of the pattern, or type of the heat transfer vinyl, you should always mirror the design.
In the Silhouette or Cricut Design Space, click the design and change the settings to mirror or flip. Why do you have to do this? Read further. In this guide, you’ll learn the step-by-step instructions on how to mirror iron-on vinyl and how to print it on the garment.
What Is Iron On Vinyl?
Iron-on vinyl also known as a heat transfer vinyl (HTV) has a heat-activated adhesive that is used to print on garments or fabrics. HTV is different from adhesive craft vinyl used for crafts like tumblers, mugs, or notebooks. In this guide, we’ll focus on heat transfer vinyl.
Which Side Do You Cut On Iron On Vinyl?
Hold on! Why should you mirror your design when using heat transfer vinyl? You should get familiar with the parts of the heat transfer vinyl.
As seen in the photo above, the shiny side is the carrier sheet. The shiny side faces the cutting mat or faces down on the cutting machine. The cover sheet covers the top of the vinyl. Meanwhile, the dull side is the actual vinyl heat transferred to a garment. The dull side is the heat-sensitive adhesive portion.
The shiny plastic backing is the barrier between the heat source and the actual print. Why? Because when the actual print comes in direct contact with heat, the vinyl will melt. Basically, it holds the design in place until the vinyl is transferred to the garment.
That’s why there’s a carrier sheet or clear plastic liner. Also, that’s why you have to mirror the design when using heat transfer vinyl.
Projects To Make With A Heat Transfer Vinyl
Does that make sense? That’s why it’s a must to mirror your design. In case you cut your design without mirroring it, there’s no way around it. You have cut a new design again. So what are the projects you can make with an iron-on vinyl?
- Plain T-shirts
- Tie-dye T-shirt
- Hoodies
- Pins
- Sweatshirts
- Canvas blanks (tote bag, pouch, apron, pillowcases)
- Read this post on Best Fabric for Heat Transfer Vinyl: Garment Printing 101
Once again, iron-on vinyl or HTV is different from adhesive vinyl. HTV is printed on garments or fabrics using a household iron or heat press machine. While adhesive craft vinyl is placed directly on crafts like mugs, tumblers, or wine glasses.
Step By Step Guide On How To Print Heat Transfer Vinyl On A Garment
Now that you’re familiar with the project ideas you can make with a heat transfer vinyl and why you should mirror the design, it’s time to learn the step-by-step instructions on how to print iron-on vinyl on a garment or fabric. Gather the supplies needed and follow these steps:
Supplies Needed
- Cutting machine (Silhouette or Cricut Machine)
- Cutting mat
- Transfer tape (for multi-layered designs)
- Heat-activated vinyl or iron-on vinyl
- Garment of your choice
- Weeding tool
- Ruler or measuring tape
- Heat press machine, EasyPress machine or regular household iron
Step 1: Prepare The Cut File
The first step is to prepare your design or cut file. You can purchase SVG files online or use the available designs on the Cricut Image Library. Make sure the measurement of the design fits well on the garment where you intend to print it.
Step 2: Scale The Design
Once you’re happy with your design, scale the design and measure the surface of the garment. For instance, if you’re printing bulk shirts of different sizes, you have to remember, that the size of the vinyl decal for small shirts should be different for 3XL shirts.
Why? Printing a small design on a 3XL shirt looks awkward. That’s why measuring the design is always important. You can use a ruler or measuring tape for this. Also, don’t forget to click the cutting mat setting because you’ll be using one in the cutting process.
Step 3: Mirror The Design
After you’ve scaled the design to its right measurement, it’s time to mirror or flip the design. Depending on the cutting machine you’re using, here’s how to mirror a design:
- For Silhouette users: Click the design, or highlight all the designs, click ‘Object’ on the upper portion, and click the option ‘Mirror’, then choose ‘Flip Horizontally’.
- For Cricut Machine users: Selec the design, click ‘Flip’, then choose ‘Flip Horizontally’.
Step 4: Place Heat Transfer On The Cutting Mat
The next step is to place the iron-on vinyl on a cutting mat. Which side goes where as mentioned above, the clear plastic liner sheet or the shiny side must face the cutting mat. The dull side should be the one that will come in contact with the cutting machine’s blade.
Cutting mats have a standard size of 12x12”. So if you need a bigger design for the t-shirt you can cut it into portions. If you have smaller designs, even though it has different colors of vinyl, you can cut them at the same time, just like in the photo seen below.
Step 5: Adjust The Cut Settings
Don’t get too excited! You need to adjust the cut settings of your Silhouette or Cricut Design Space. The cut settings consist of the force and speed of the cutting machine’s blade. When you send the design to the cutting machine, you can change the cut settings in that portion.
First, make sure to select which type of vinyl you’ll be using. In the Cricut Design Space, change the ‘Custom material set to’ to heat transfer vinyl. You can also see options for glitter HTV or special types of vinyl.
Once you’ve chosen the type of vinyl you’ll use, the force, speed, and cutting settings will automatically change. This is the default recommended settings for that particular type of iron-on vinyl.
Step 6: Test Cut And Get Ready To Cut Iron On Vinyl!
It’s always recommended to do a test cut. The purpose of a test cut is to determine if the vinyl easily separates from the carrier sheet during the weeding process. If it doesn’t, then the force settings need to be increased.
Sometimes, it takes several test cuts to determine the right combination of the force and speed especially when you’re dealing with a new type of vinyl. It’s recommended to take down notes of the settings for that particular pattern of vinyl as your guide for your next vinyl project.
This is to save time, effort, and of course your vinyl for your future projects. Once you’re confident with the cut settings, it’s time to proceed and cut the vinyl. Most cutting machines will prompt if you want to cut your design ‘mirrored’.
Which is the last reminder for you in case you haven’t mirrored the design. However, if you have a mirrored image already, there’s no need to respond to that prompt. When all is good, proceed to cut your design.
Step 7: Weed Out Excess Vinyl
The next step is to weed out the excess vinyl. Basically, what this means is to remove the excess vinyl of the heat transfer material you don’t want to be transferred to your fabric. Only the design itself should be left sticking to the clear plastic backing.
Step 8: Iron Or Heat Transfer The Vinyl To The Garment
When you’re done wedding the vinyl, it’s time to transfer the design to the garment of your choice. You can use an everyday iron, EasyPress machine, or heat press machine as your source of heat. However, a heat press machine is always recommended.
It’s time to set up your heat press machine. Make sure to choose the right temperature and time settings depending on the type of iron-on vinyl you have. Here’s a guide for the available HTV products at TeckWrap Craft.
TeckWrap Craft Heat Transfer Vinyl Heat And Time Guide
TeckWrap Craft HTV | Heat Press Temperature (in ℉) | Time (in seconds) |
---|---|---|
Colorful Camouflage Heat Transfer | 300-315 ℉ | 10-15 |
Flock HTV | 300-315 ℉ | 10-15 |
PU HTV | 300-315 ℉ | 10-15 |
PU Rainbow Stripes HTV | 266-284 ℉ | 8-12 |
Glitter HTV | 300-315 ℉ | 10-15 |
Colorful Splash HTV | 300-315 ℉ | 10-15 |
Galaxy HTV | 266-284 ℉ | 8-12 |
Glow In The Dark HTV | 300-320℉ | 8-12 |
Snowflakes Pattern HTV | 300-315 ℉ | 10-15 |
Once the heat press machine has reached its recommended temperature setting, it’s time to pre-press the fabric. This is an important step that other people missed out on pre-pressing the fabric.
To pre-press, place the garment on the heat press machine, or under the EasyPress machine, do not include the vinyl yet! Press the garment using light pressure for 5-10 seconds on a solid surface. The purpose of pre-pressing the garment is to remove the moisture from the fabric so the HTV adheres well.
Even though you just bought a T-shirt even without washing it, there’s moisture in it. That’s why you need to pre-press the print surface. Once you’ve pre-pressed the garment, you’re ready to print the design.
When printing, the carrier sheet should come in contact with the heat press. In other words, it should not look mirrored when placed on top of the garment. Press for the design with medium to heavy pressure following the recommended settings.
Do you remove the carrier sheet right away? This depends on the iron-on vinyl that you have. That’s why it’s important to read the product description of the vinyl before buying one. Confirm if the vinyl is cold peel, warm peel, or hot peel. This will be discussed further in the latter part of the article.
Washing Instructions
Now that your masterpiece has come to life, it’s best to know the washing instructions as well to ensure the vinyl decal lasts longer on the garment. As a general rule, avoid wearing, washing, or folding the garment 24 hours after printing the iron-on vinyl. In short, let the print sit for a while.
Let the adhesive cure for 24 hours to ensure the vinyl has adhered properly to the garment. After 24 hours, you can wash or wear it! For the care instructions on garments with iron-on vinyl print, here’s what you should know:
- Wash the shirt inside out
- Use cold water
- Avoid harsh detergents
- You can use fabric softener
- Hang to dry or tumble dry on low heat (avoid high heat when spinning dry)
- Do not iron directly on the print as this may activate the vinyl’s adhesive and may cause the vinyl to peel off
Cold Peel vs Warm Peel vs Hot Peel Heat Transfer Vinyl
As promised earlier, we’ll discuss further cold peel, warm peel, and hot peel. As you may know, there are different brands of vinyl, textures, and patterns. All of which differ in their peeling temperature. Here’s what they meant:
- Cool peel: Remove the carrier sheet after pressing when the whole decal has completely cooled off. It may take 1 minute or longer.
- Warm peel: Remove the carrier sheet after pressing when the whole decal is warm to the touch. This may take 30 seconds.
- Hot peel: Remove the carrier sheet after pressing when the whole decal is still hot. This means you can remove the carrier sheet right after pressing the design.
What happens if you don’t follow the peeling instructions of a heat transfer vinyl? There’s one possible outcome — the vinyl adhesive won’t stick well to the shirt. In case this happens, try to press the vinyl once again. This time, follow the peeling instructions. If not, the whole project might go to waste.
Tips When Printing Heat Transfer Vinyl
Pretty exciting stuff, huh? As long as you follow the instructions mentioned above, printing on garments should be easy-peasy. However, if you’ve been printing using heat transfer vinyl for a while now, there are problems you may encounter along the way.
In this part, let’s discuss some tips when printing iron-on vinyl. If you’re just starting out in this industry, pay close attention. If you’re a craft aficionado, it’s nice to refresh your memory with these useful tips.
Where To Get Cut files?
As a crafter, one of the challenges is how to create and where to get cut files or your design. If you have graphic designing skills, this wouldn’t be a challenge. If that’s not the case, then you should know where to get cut files. Here are some ways to get cut files:
- Free vectors from the Cricut Design Space
- Free cut files that can be downloaded online
- Purchase designs from reliable sources
How To Avoid Wasting Vinyl?
One problem most vinyl crafters encounter is wasted vinyl. Don’t be one of those crafters who waste and throw all the excess vinyl, so here are some tips to remember:
- Cut iron-on vinyl, using the right amount that fits your design. Leave at least half an inch on each border.
- When weeding excess vinyl, don’t get rid of the designs you think you can use in the future. For instance, a small heart figure can be kept in a scrap collector so you can use it for future projects.
- To avoid wasting vinyl, you need to have a keen eye on where the cut lines are. It helps if you have a tabletop with light, use your tablet as a background (for the sake of having a light source), or use a desk lamp.
- You can bend the decal so you can see clearly where the cut lines are.
- Always use a weeding tool or tweezer when removing excess vinyl.
- When weeding excess vinyl, start by removing the outer part of the design. Move to remove the smaller and more intricate designs later on.
- Always test cut! It will be a waste if you can’t weed the vinyl properly later on.
- Always mirror the design especially if you used heat transfer vinyl. If you’re done cutting the design without mirroring the image, that work will go to waste.
How To Iron Heat Transfer Vinyl On The Shirt
For craft vinyl, the creation of merchandise is pretty easy and straightforward. After weeding the design, all you have to do is stick it to the blank merchandise. However, it’s not the same with a heat transfer vinyl.
After the weeding process, you have to press the design onto the garment. It may sound easy, but you may encounter struggles along the way. So here are some tips on how to iron heat transfer vinyl onto a garment:
- You can use a heat press machine, EasyPress, or your everyday iron. However, when you’re using a household iron, make sure to turn off the steam settings.
- Position the design properly on the garment. The iron-on vinyl shiny side should be facing upward and the design should not look mirrored.
- Make sure to position the design properly on the shirt. Check if it’s in the right position where you want it to be. Or if you want it in the center, measure all corners to ensure it has the right placement.
- Press the vinyl on a flat surface, preferably a wide sturdy table. Avoid using an ironing board as it may not withstand even gentle pressure.
- You can use additional protection on top of your carrier sheets like a parchment paper or Teflon sheet when pressing the design.
Frequently Asked Questions
Bottom Line
To sum it all up, iron-on vinyl or heat transfer vinyl should be mirrored or Flipped Horizontally whether you’re using Silhouette or Cricut Design Space. The shiny plastic carrier sheet faces down on the cutting machine.
Before you press a design on the T-shirt, make sure the entire design does not look like a mirror image. It must be the actual design that needs to be printed on the shirt.
Also, make sure you follow the right pressure, time, and temperature. Too much heat may cause the vinyl not to transfer well, or in some cases, the garment may burn especially if it’s a thin cotton fabric.