Posted By TeckWrap Craft On July 21, 2022

Reverse weeding is a weeding process using a transfer tape.. The vinyl is transferred to the transfer tape to weed out the unwanted parts of the design. As opposed to using a weeding tool and taking out the unwanted parts of the vinyl piece by piece.

Reverse weeding is ideal for intricate designs and also saves time by weeding piece by piece using a weeding tool. Plus, with reverse weeding, you won’t have to worry about missing the ‘must-weeded parts’ of the design.
If you’re not quite sure on how to go about with this weeding hack, don’t worry! Today, you’ll learn about reverse weeding. So the next time you work on intricate vinyl designs, you won’t miss a piece, plus you’ll save so much time.
Step By Step Guide On How To Reverse Weed Vinyl
The process of reverse weeding is pretty straightforward. Basically, transfer tape is used first even before weeding the vinyl, hence, reverse weeding.
Reverse weeding is a technique used for adhesive vinyl — which includes permanent and removable vinyl. To be clear, you can’t reverse weed heat transfer vinyl. Here’s the step-by-step guide plus useful tips on how to reverse weed adhesive craft vinyl.
Supplies Needed
First, you need to gather the supplies needed. You’ll pretty much need the same materials when personalizing crafts using adhesive vinyl. Make sure these supplies are complete when reverse weeding:
Prepare The Design
First step is to prepare the design. Whether your design has intricate details or small letters, reverse weeding will make it easier and faster for you to weed the entire piece. The preparation stage is essential especially that you need to choose the right cut settings.
In your Cricut design space or Silhouette studio, make sure to change the material setting used. There are options for the vinyl type in the design studio. Make sure to choose the right material depending on the vinyl you’ll be using.
As you choose the right vinyl material, the cut settings like blade depth, force and speed automatically changes. However the given settings do not guarantee the right depth of cutting of the vinyl material, which leads us to the next step.

Test Cut Then Cut The Design!
This is a MUST step — always test cut. Make sure to test cut before you attempt to cut the entire design. You want the cutting machine’s blade to cut just right through the vinyl without reaching the paper backing. If the vinyl does not remove easily from the paper backing, or the paper backing was reached by the cutting blade, then the cut settings need to be adjusted.
If the adhesive vinyl does not weed easily, you may need to increase the thickness or depth of the blade settings. If the paper backing of the vinyl was cut, you need to decrease the thickness or depth of the blade setting.
Change the cut settings and continue to do test cuts as soon as you’re satisfied. Don’t forget to use a cutting mat and of course not to mirror adhesive vinyl. Mirroring the design only applies for heat transfer vinyl. Never mirror adhesive craft vinyl.
Just a reminder, if the cut settings isn’t right or the test cut fails, it will be a challenge to reverse weed later on. This step is essential for a successful reverse weeding. Once you’re satisfied with the test cut, proceed with cutting the design.
Place The Transfer Tape Over The Adhesive Vinyl
Once the vinyl decal is done cutting, it’s time to place the transfer tape over the adhesive vinyl. It’s better to use a transfer tape with grid lines for easier alignment. Here are the steps and tips to remember for this part:
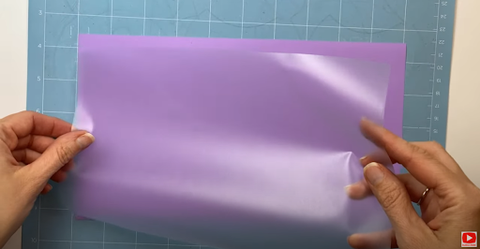
- Use the right size of transfer tape, at least one inch bigger on all sides as compared to the vinyl decal.
- Don’t forget to remove the paper backing of the transfer tape.
- The sticky side of the transfer tape is placed over the colored part of the vinyl.
- Don’t remove the adhesive vinyl just yet on the cutting mat.
- Do not remove the vinyl backing as well.
To know how to transfer tape over the adhesive vinyl check our blog.
Burnish Both Front And Back Using A Squeegee
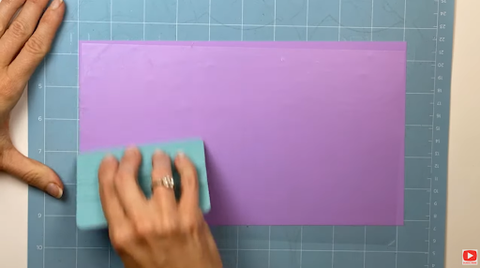
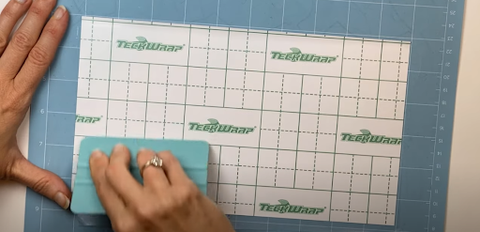
The next step is to burnish the transfer tape into the adhesive vinyl. The goal of this step is to ensure that only the design transfers into the transfer tape. After burnishing the front part, flip over the vinyl and don’t forget to burnish the back portion too. You want to make sure the vinyl transfers properly to the transfer tape.
Remove The Paper Backing Of The Vinyl
Once you’re done burnishing both the front and back of the vinyl and transfer tape, it’s time to remove the paper backing as shown on the image below. Start with the upper left corner because it’s easier to peel off the paper backing this way.
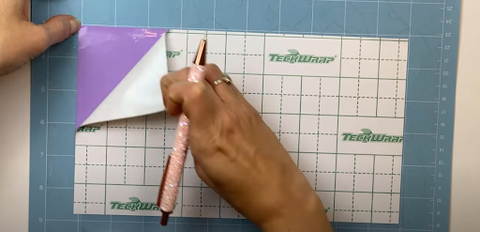
Remove the paper backing slowly and check if the whole vinyl has completely transferred to the transfer tape. If the vinyl does not completely transfer to the transfer tape, repeat the burnishing process. If the paper backing comes off easily, proceed to the next step.
Start Reverse Weeding Vinyl
Now this is the part where you start to weed adhesive vinyl (the chunk part to be specific). Start with one corner, and slowly remove the vinyl. If you check both images below, as the bigger chunk of the vinyl is peeled off and the decal design remains on the transfer tape.
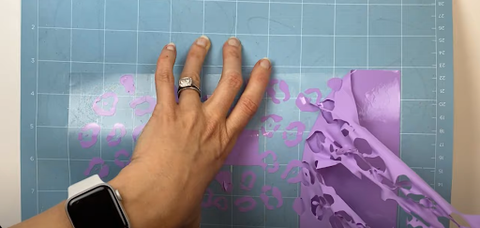
Weed The Inner Cavities
Once the excess weed has been removed, you can expect that portions of inner cavities of the design still remain. That’s why it’s important to double check the entire image for small letters or intricate designs in case there’s a need to weed it.
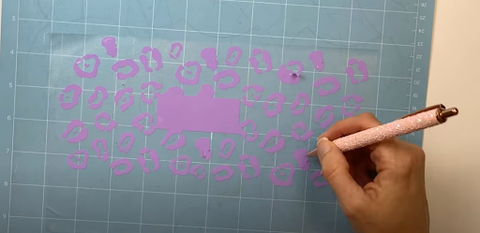
Using a weeding tool or pen, weed small vinyl letters and intricate cuts. Have proper lighting on your surroundings or use a light pad underneath. As soon as all excess vinyl are removed, you’re ready to transfer the vinyl to the merchandise.
If you want to watch the full video on what is reverse weeding and how to do it, make sure to check out the instructional video at TeckWrap Craft’s YouTube page, How to Weed Small Pieces Design with Reverse Weeding.
Frequently Asked Questions
Can you reverse weed permanent vinyl?
Yes, you can reverse weed permanent vinyl and removable vinyl as well. Reverse weeding vinyl is an easier way to remove excess vinyl if you’re using adhesive vinyl.
How do you reverse weed with transfer tape?
To reverse weed using a transfer tape, place the transfer tape on top of the decal. Burnish the decal so the vinyl transfers to the transfer tape. Then, remove the excess vinyl and weed the remaining inner cavities.
Can you reverse weed heat transfer vinyl?
No, you cannot reverse weed heat transfer vinyl. In the first place, you cannot transfer heat transfer vinyl on the transfer tape. So reverse weeding simply won’t work for heat transfer vinyl.
Summing It All Up!
If you think reverse weeding is hard, think again. It’s absolutely easy, plus you can save more time and effort especially when you’re working on intricate designs.
For all your craft needs, may it be heat transfer vinyl, adhesive craft, weeding tools, craft blanks or transfer tape, make sure to check out TeckWrap Craft’s collection. You’ll find great selections of high quality vinyl at a reasonably low price. Plus, shipping worldwide is now available! Happy crafting!


