Posted By TeckWrap Craft On March 19, 2022
Can You Use Heat Transfer Vinyl On Leather?

Can you use heat transfer vinyl on leather? Yes, you can use heat transfer vinyl on leather. Simply cut and weed your design, and transfer it to the leather blank by applying heat and pressure using a heat press or dry household iron. In this blog, we have presented a detailed description of how you can use heat transfer vinyl on leather.
Supply list
- Leather Blank: This can include any item made of leather such as a wallet, journal, keychain, belt, and so on.
- Cutting Machine: An automated cutting machine like Cricut or Silhouette helps in cutting accurate HTV designs no matter how intricate they are.
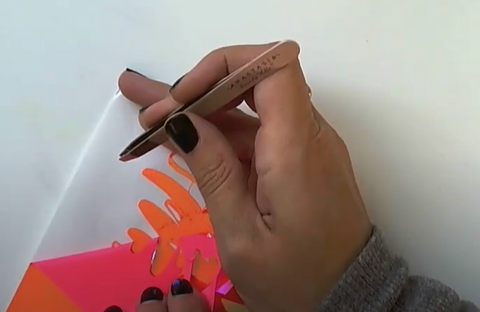
- Weeding Tools: You can use a tweezer, weeder, or a weeding pen to remove negative vinyl pieces.
- Cutting Mat: This holds the heat transfer vinyl while the cutting machine carves the design on it.
- Squeegee: You will need this to smooth out the vinyl while placing it on the cutting mat so it sticks properly without any creases.
- Heat Transfer Vinyl: Choose the color and finish you want. For premium-quality HTV, browse the TeckWrap Craft collection.
- Heating Implement: You may use a dry household iron or a heat press machine, whatever you have available.
- Parchment Paper or Teflon Sheet: This protects the vinyl and faux leather from any damage caused by excessive heat.
Step By Step Guide: How To Apply HTV On Leather?
First off, prepare your work area with the materials and machines you will be needing.
Remove any clutter from your table, and wipe clean and dry the leather surface of your bag or whatever project you intend on using.
The way you apply heat transfer vinyl to faux leather is more or less similar to how htv vinyl is applied to other surfaces.
Prepare Your Design
Regardless of cutting software you use for your design, be it Sihouette Studio, or Circut Design Space, make sure to cut your design in mirror format. Why mirror the image? Because the design needs to be flipped during application.
Use the appropriate settings of your cutting machine depending on the htv used.
Load or add heat transfer vinyl on the cutting mat properly, otherwise your machine won’t cut.
Properly Weed Your Design
This is why good quality weeding tools is a must to be able to remove any excess vinyl from the carrier sheet.
Weeding can be a tedious process and a sharp reliable weeding tool can remove even the smallest of any adhered excess vinyl pieces.

Applying HTV
When applying your vinyl to leather, lay your htv flat on your leather surface, sticky side down, shiny side up.
Protect your design with a thin piece of cover sheet (i.e. parchment paper or teflon sheet).
If you are using an iron, cotton or linen temperature setting would be enough. More heat might melt or destroy the vinyl or the leather.
Press, not glide, the iron applying firm pressure for 15 seconds.
Check if the vinyl has adhered, if not repeat the process.
Peeling HTV
Peel the carrier sheet ever so gently.
Once the design is exposed, check for air bubbles and complete adhesion. You can check our guide on removing bubbles easily.
For good measure, you can apply heat again, you may use a lower temperature this time around.
Protect your design with a cover sheet. Apply firm pressure and iron.
Tips
- Applying vinyl to leather is the easy part.
- Do follow the recommended settings for all your tools and machines, and even software.
- In our haste to get things done, we might forget to follow as advised, and we will end up spending more time and materials redoing our worse, repeating our project.
- Cutting machines rely on sensors to cut properly, so best to have a workstation with sufficient lighting.
- Check the condition of your tools and machines every once in a while. A cutting mat might lose its stickiness from frequent use, same with your cutting blade, it can become dull. This is why most professional crafters encourage newbies to practice the habit of doing a test cut.
Frequently Asked Questions
Conclusion
Starting a new crafting journey may lead to some hiccups and even a a series of minor frustrations as we navigate our way around the concepts, tools, software, machines, etc, but do make fun and learning a priority.
There are also tons of free online resources to get you started, thanks Google. Some crafters even offer free templates for you to readily print.
Before you know it, you will crafting your personalized DIY projects, for personal use or as leather gifts to family and friends - your creativity is up to you!


