Set your iron to its highest heat setting and press it on the design for about 30 seconds. Once the vinyl starts to soften and wrinkle at the edges, use a pair of tweezers to peel it off gently. If any adhesive stays behind, try rubbing alcohol or a commercial vinyl remover on the back of the shirt. That combination works for most fabrics and most designs.
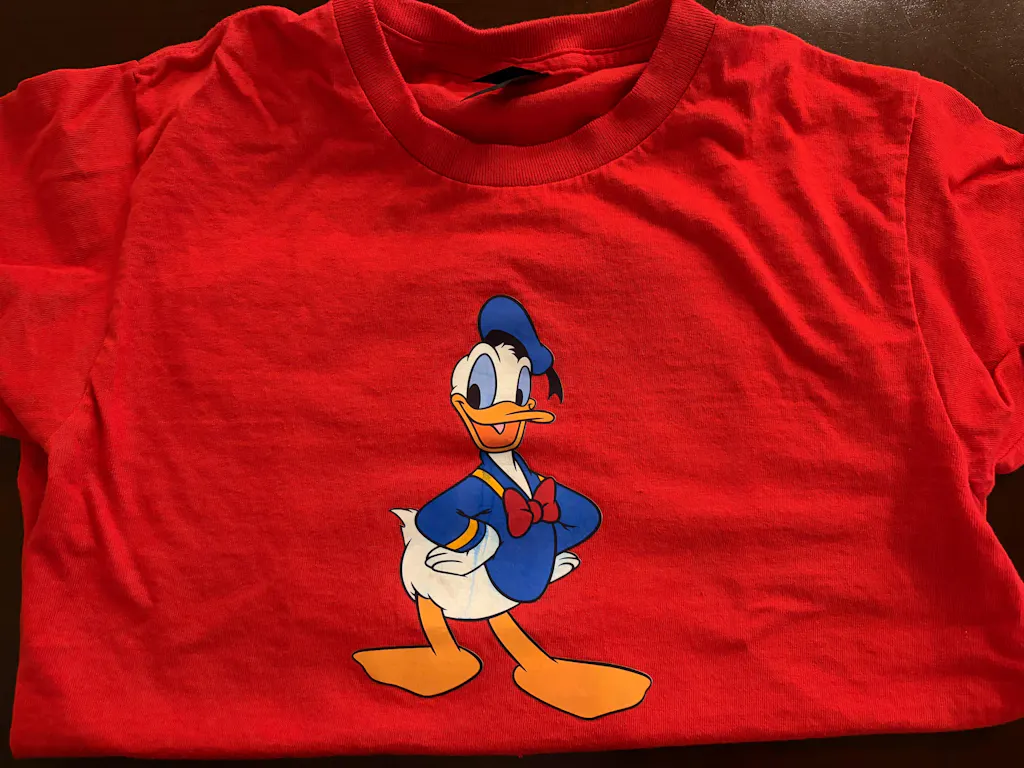
We all make mistakes. Maybe you pressed the wrong design, noticed a spelling error after the vinyl was already on, or you want to update an old shirt with something new. Whatever the reason, heat transfer vinyl can be removed from fabric without ruining the shirt. You just need to pick the right method for your situation.
There are eight ways to do this, and the best one depends on your fabric type and what you already have at home. We have tested all of them, so this guide will tell you exactly what works, what does not, and what to watch out for along the way.
Before jumping into the steps, take ten seconds to find your situation in this table. It will save you time and protect your shirt.
Your Situation
Best Method to Use
Cotton shirt, you have an iron at home
Method 1: Iron (quickest option)
Polyester or delicate fabric
Method 3: Rubbing Alcohol (safest for synthetics)
Old, stubborn, or cracked HTV design
Method 4: Commercial HTV Remover
Caught the mistake right after pressing
Method 6: Goo Gone
No heat tools available right now
Method 3: Rubbing Alcohol or Method 5: Acetone
Large design or want thorough cleanup
Method 8: Washing Machine and Dryer
Does the Method Change Based on Your Fabric?
Yes, and this is the most important thing to check before you start. High heat works well on cotton but it can permanently damage polyester. A lot of people make the mistake of going straight for the iron on a synthetic shirt and end up with scorched or melted fabric. Check the care label on your shirt first, then match it to this table.
Fabric Type
Methods That Work
What to Avoid
100% Cotton
Iron, heat gun, hairdryer, any chemical method
Nothing specific. Cotton handles high heat and most solvents well.
Polyester
Rubbing alcohol, acetone, commercial remover
High heat from an iron or heat gun. Polyester can melt or get a permanent sheen.
Poly-Cotton Blend
Low heat iron setting combined with rubbing alcohol
Maximum heat settings on the iron or heat gun.
Delicate fabrics (silk, linen)
Cold rubbing alcohol applied gently from the back
Any heat method and harsh chemical solvents.
8 Methods to Remove HTV from a Shirt
Go through the steps for whichever method fits your situation. Each one has been written in order so you do not have to guess what comes next.
Method 1: Using an Iron
Time5 to 10 minutes
DifficultyEasy
Best ForCotton shirts
1Set the iron to the highest temperature that is safe for your shirt fabric. Check the label if you are unsure. Make sure steam is turned off and you are using a flat, dry iron.
2Pull the shirt tight over the ironing board so the HTV design faces up and the fabric is flat underneath.
3Place the iron directly over the vinyl and press down firmly for about 30 seconds. The vinyl will start to wrinkle and the edges will begin lifting away from the fabric.
4As soon as you see the edges lifting, grab them with a pair of tweezers and start peeling from one corner. Keep the fabric pulled tight with your other hand and peel at a low angle so you do not stretch or tear the shirt.
5Once all the vinyl is off, wash the shirt on a hot cycle and put it in the dryer. The heat helps break down any sticky residue left behind on the fabric.
Helpful Tip: Slide a sheet of parchment paper underneath the shirt before ironing. This stops the adhesive from transferring onto your ironing board when the vinyl softens.
Method 2: Using a Heat Gun or Hairdryer
Time5 to 10 minutes
DifficultyEasy
Best ForAll fabric types. Lower the heat if working with polyester.
1Stuff a folded towel or a piece of cardboard inside the shirt before you start. This stops heat from passing through to the back of the shirt and leaving marks.
2Place the shirt flat on an ironing board with the HTV design facing up.
3Hold the heat gun or hairdryer about one to two inches above the vinyl. Set it to the highest heat and move it back and forth in slow, steady passes. Do not hold it still in one spot.
4After about 30 seconds, check the edges of the design. They should start to curl and pull away from the fabric.
5Use tweezers to grab the lifted edge and peel the vinyl off slowly. If a section resists, apply more heat to that spot for another 15 to 20 seconds before trying again.
6When all the vinyl is gone, wash the shirt to clear out any leftover adhesive residue.
Helpful Tip: A heat gun gets significantly hotter than a hairdryer and will loosen stubborn designs faster. If you are working on polyester, use a hairdryer on a medium setting to avoid overheating the fabric.
Method 3: Using Rubbing Alcohol
Time10 to 20 minutes
DifficultyModerate
Best ForPolyester, delicate fabrics, any shirt where heat could cause damage
1Turn the shirt inside out and hold the back of the vinyl design over a sink or basin.
2Pour rubbing alcohol generously over the back of the design. You can also soak a cloth in alcohol and hold it against the area for a minute to let it saturate the adhesive.
3Using both hands, tug and pull the fabric around the design in different directions. This stretching motion helps the alcohol work its way into the adhesive layer and break it down.
4Keep soaking the area with more alcohol and tugging as needed. The edges of the vinyl will gradually start to come away from the fabric. Be patient because this method takes a few minutes longer than heat-based removal.
5Once the edges are loose, switch to tweezers and remove the vinyl piece by piece.
6If you see any sticky residue left on the shirt after the vinyl is off, rub a small amount of petroleum jelly over the area, let it sit for a minute, then wash the shirt right away with detergent.
Helpful Tip: Rubbing alcohol at 90 percent concentration or higher works better and faster than the standard 70 percent variety you find at most pharmacies. Look for it at hardware stores or online.
Method 4: Using a Commercial HTV Remover
Time10 to 15 minutes
DifficultyEasy
Best ForAll fabric types. Best choice for old, stubborn, or cracked HTV designs.
1Read the instructions on the remover bottle before you start. Work in a well-ventilated room, put on gloves, and keep the product away from any open flames or heat sources because most commercial removers are flammable.
2Turn the shirt inside out. The back of the vinyl design will feel noticeably stiffer than the rest of the fabric. That is the area you need to target.
3Apply a good amount of remover to the back of the entire design, making sure you cover all the edges. Do not be stingy with it.
4While the product soaks in, use your hands to gently tug and pull the fabric around the design. This helps the remover penetrate deeper into the adhesive.
5When you see the edges starting to separate, use tweezers to pull away large sections of vinyl. If a section is stubborn, apply more remover and wait another 30 seconds.
6After the vinyl is completely removed, dampen a clean cloth with a little more remover and rub the area in circular motions to pick up any adhesive residue. The fabric should stop feeling stiff once the residue is gone.
7Finish by washing the shirt thoroughly in hot water to remove all traces of the solvent.
Helpful Tip: AlbaChem VLR is the product most professional print shops use for this exact job. It works on over 15 types of heat transfer vinyl including glitter, metallic, and other specialty finishes.
Method 5: Using Acetone (Nail Polish Remover)
Time10 to 15 minutes
DifficultyEasy
Best ForCotton and most standard fabrics. Always test on a hidden area first.
1Before anything else, dab a small amount of acetone on a hidden part of the shirt, like the inside of the hem. Wait 60 seconds and check for colour fading or texture changes. If the fabric looks the same, you are good to go. If it changes at all, stop and use rubbing alcohol instead.
2Soak a cotton ball thoroughly with acetone.
3Press the soaked cotton ball firmly against the back of the vinyl design and hold it there for about 30 to 60 seconds. The adhesive will start to soften and break down.
4Use tweezers to peel away the vinyl from the edges inward. Re-soak the cotton ball as needed and keep working your way across the design.
5Once all the vinyl is off, wash the shirt to remove the acetone and any remaining adhesive.
Helpful Tip: Pure 100 percent acetone works noticeably faster than regular nail polish remover, which contains added oils and conditioners that slow down the process. You can find 100 percent acetone at most hardware stores.
Method 6: Using Goo Gone
Time10 to 15 minutes
DifficultyEasy
Best ForCotton and standard non-delicate fabrics
1Cover your workspace with an old plastic bag or a piece of cardboard first. Goo Gone can leave oily marks on surfaces, so protect your table before you start.
2Apply heat to the vinyl design using an iron for about 20 to 30 seconds to soften the adhesive before the Goo Gone goes on.
3Turn the shirt inside out and spray Goo Gone generously on the back of the warm vinyl. Let it sit for 30 to 60 seconds but do not let it dry out completely.
4Once the vinyl starts to separate from the fabric, use tweezers to peel it away. Work from the edges inward.
5Rinse the treated area under warm running water right away. Then machine wash the shirt on a hot cycle within 10 minutes of applying the Goo Gone.
6Check the shirt after washing. If any residue remains, repeat the process with a second application.
Helpful Tip: Always rinse and machine wash the shirt within 10 minutes of applying Goo Gone. Letting it sit too long without washing can leave a permanent oily stain that is very hard to get out. If you are unsure about your fabric, test on a hidden seam first.
Important Warning
A word of caution with Goo Gone: some crafters have reported oily stains on fabric when the product was left on too long before washing. Always rinse quickly and wash within 10 minutes. If your shirt is made of a delicate or expensive fabric, use Method 4 instead since it does not carry this risk.
Method 7: Using Petroleum Jelly
Time20 to 30 minutes
DifficultyChallenging
Best ForDelicate fabrics when nothing else is available. Last resort option.
1Turn the shirt inside out and place a piece of cardboard inside it to separate the front and back layers. This stops petroleum jelly from soaking through to the back of the shirt.
2Scoop out a generous spoonful of petroleum jelly and rub it onto the back of the vinyl design using your fingers in a circular motion. Mix in a few drops of liquid laundry detergent as you rub.
3Watch the front of the shirt. The adhesive will begin to clump and loosen as the petroleum jelly breaks it down.
4Use tweezers to peel the vinyl away from the front of the shirt as it loosens.
5Rinse the treated area with hot water, rubbing firmly with your fingers to dissolve the petroleum jelly. Repeat the rinse a few times until the greasy feeling is gone.
6Wash the shirt immediately with a strong laundry detergent to remove the oily patch completely.
Helpful Tip: This method takes the most time and effort and it is not the most effective option available. Use it only when you have nothing else on hand. For fresh HTV that was just pressed, it can work reasonably well. For older designs, try Method 3 or Method 4 first.
Method 8: Using the Washing Machine and Dryer
Time45 to 60 minutes including machine time
DifficultyEasy
Best ForFixing a recent pressing mistake or clearing adhesive residue after another method.
1This method gives the best results when the HTV was pressed within the last few hours and has not had time to fully bond with the fabric.
2Turn the shirt inside out and apply Goo Gone or rubbing alcohol to the back of the vinyl design. Let it sit for about 30 seconds.
3Place the shirt in the washing machine with a strong detergent and run it on the hottest water setting that is safe for the fabric. Skip the fabric softener. Adding fabric softener seals the adhesive into the fibers and makes it much harder to remove.
4As soon as the wash cycle finishes, move the shirt directly into the dryer on the highest heat setting. The combination of hot air and tumbling motion helps loosen the vinyl from the fabric.
5Once the dryer cycle ends, take the shirt out while it is still warm and peel the vinyl away with tweezers. It should come off much more easily than it did before going in the machine.
Helpful Tip: Do not add fabric softener to the wash. It is one of the most common mistakes people make with this method and it undoes all the progress from the solvent you applied.
5 Common Mistakes People Make When Removing HTV
Getting the vinyl off is satisfying. Ruining the shirt in the process is not. Here are the five mistakes that trip people up most often, and what to do instead.
The Mistake
What Goes Wrong
What to Do Instead
Using a heat press to remove the vinyl
The heat press applies uniform, heavy pressure across the whole design. Instead of loosening the adhesive, it bakes it deeper into the fabric.
Use a household flat iron. It gives you better control over where the heat goes and how much pressure you apply.
Ironing polyester on a high heat setting
Polyester fibers melt or develop a permanent shiny mark when exposed to high heat. The damage cannot be undone.
For polyester, skip heat entirely. Use rubbing alcohol or a commercial remover applied to the back of the shirt.
Yanking the vinyl off quickly
Pulling at a steep angle or peeling too fast stretches the fabric fibers. This leaves permanent distorted or shiny patches on the shirt.
Peel slowly at a low angle, about 30 degrees. Keep the fabric taut with your free hand while you pull.
Adding fabric softener when washing
Fabric softener coats the fabric fibers and effectively traps the adhesive residue inside the weave. The residue becomes almost impossible to remove after that.
Wash with detergent only. No fabric softener at any point in the removal process.
Skipping the patch test with chemical methods
Some solvents fade dye colors or damage certain fabric finishes. You will not know until it is too late if you apply straight to the design area.
Test on a hidden spot first, like the inside of a hem or side seam. Wait 60 seconds before moving on to the main area.
Can You Put a New Design on the Shirt After Removing HTV?
Yes, you can in most cases. Once the vinyl is off and the shirt has been washed, you can re-press a new design onto the same fabric. There are just a few things to check before you do.
Wash and dry the shirt fully before pressing anything new. Any solvent residue left in the fabric will prevent the new HTV adhesive from bonding properly.
Check for ghost marks. Hold the shirt up to the light. If you can see a faint sheen or adhesive shadow where the old design was, treat that spot with rubbing alcohol and wash again.
Let the shirt cool completely. Pressing onto a warm shirt causes uneven adhesion. Give it time to reach room temperature first.
Iron it smooth before pressing. If the fabric was stretched or puckered during removal, run a regular iron over it (no vinyl) to flatten it back out before applying the new design.
If you used a chemical remover or Goo Gone, make sure the shirt is completely dry and the chemical smell is gone before you press new vinyl. Residual chemicals can interfere with the adhesive bond on the new design.
Popular HTV Remover Products: A Quick Comparison
If you are not sure which product to buy, here is a straightforward breakdown of the four most commonly used options.
Product
How Well It Works
Fabric Safety
When to Use It
AlbaChem VLR
Excellent across almost all HTV types including specialty finishes
Safe on most fabrics
Professional use, old or stubborn designs, glitter HTV
Goo Gone
Works well on fresh designs and light adhesive residue
Test on fabric first since it can leave oily stains
Quick fixes on cotton after a recent pressing mistake
Rubbing Alcohol (90% or higher)
Moderate. Works best with some patience and elbow work
Test on a hidden area first since it can affect some dyes
Cotton and synthetic blend shirts where rubbing alcohol is too slow
Frequently Asked Questions
It should not, as long as you match the method to your fabric type. Cotton can handle heat-based removal without any problem. Polyester and delicate fabrics need a chemical approach like rubbing alcohol or a commercial remover. The other thing that damages shirts most often is pulling the vinyl off too quickly. Peel slowly and keep the fabric taut while you work.
Use the highest setting that is safe for your specific shirt fabric. Check the care label for guidance. For 100 percent cotton, that is usually the highest setting on the iron. For poly-cotton blends, try a medium setting and check the fabric frequently. Never use a high heat setting on pure polyester.
Wash the shirt in hot water as your first step. If residue is still there after washing, dab rubbing alcohol directly onto the affected spot, let it sit for about 60 seconds, then wash again. A lint roller can also help pick up small adhesive fragments before you put the shirt in the wash.
Not really. Cracked vinyl tends to break into small pieces when you try to remove it, which makes the job messier and more time-consuming than dealing with a fresh, intact design. A commercial remover like AlbaChem VLR works best on aged or cracked HTV because it dissolves the adhesive rather than relying on lifting the vinyl in one piece.
Yes. Use rubbing alcohol or a commercial HTV remover applied to the back of the design. Turn the shirt inside out, saturate the area, and use gentle tugging motions while the solvent soaks in. Do not use a hot iron on polyester. The heat will permanently damage the fibers.
Yes, it is a bit different. Glitter HTV is made in layers and tends to crack and fragment when you try to peel it. Use a commercial remover like AlbaChem VLR applied to the back of the design and remove small pieces at a time with tweezers. Avoid the iron method with glitter HTV since the glitter particles can transfer onto the iron plate and scratch it.
It depends on the method and the design. The iron method on a cotton shirt typically takes 5 to 10 minutes from start to finish. Chemical methods on older or more complex designs can take 20 to 30 minutes. The washing machine and dryer method takes 45 to 60 minutes once you include the machine cycle. Multi-layer or glitter designs take the longest regardless of which method you use.
Most fabrics handle HTV removal well, but delicate materials like silk and linen need extra care. Stick to cold rubbing alcohol for those fabrics and avoid any heat or harsh solvents. Always test your chosen method on a small hidden area of the shirt before applying it to the main design.
Wrapping Up
Removing heat transfer vinyl is not as complicated as it seems once you know which method to use. For cotton shirts, the iron method is the fastest and easiest place to start. For polyester and delicates, go straight to rubbing alcohol or a commercial remover and skip the heat entirely. Once the vinyl is off and the shirt has been washed, you can press a fresh design right onto the same fabric.
If you found this guide useful, the next step is making sure your new HTV goes on properly the first time. TeckWrap Craft carries heat transfer vinyl for cotton, polyester, and blended fabrics including PU, glitter, metallic, and specialty finishes.
Ready to press a fresh design? Shop TeckWrap heat transfer vinyl for every fabric type.
I like that is easy to use, and I was very excited to try it, but I have used it many times and the color of the print doesn't stay after washing, even though I have followed the care instructions.