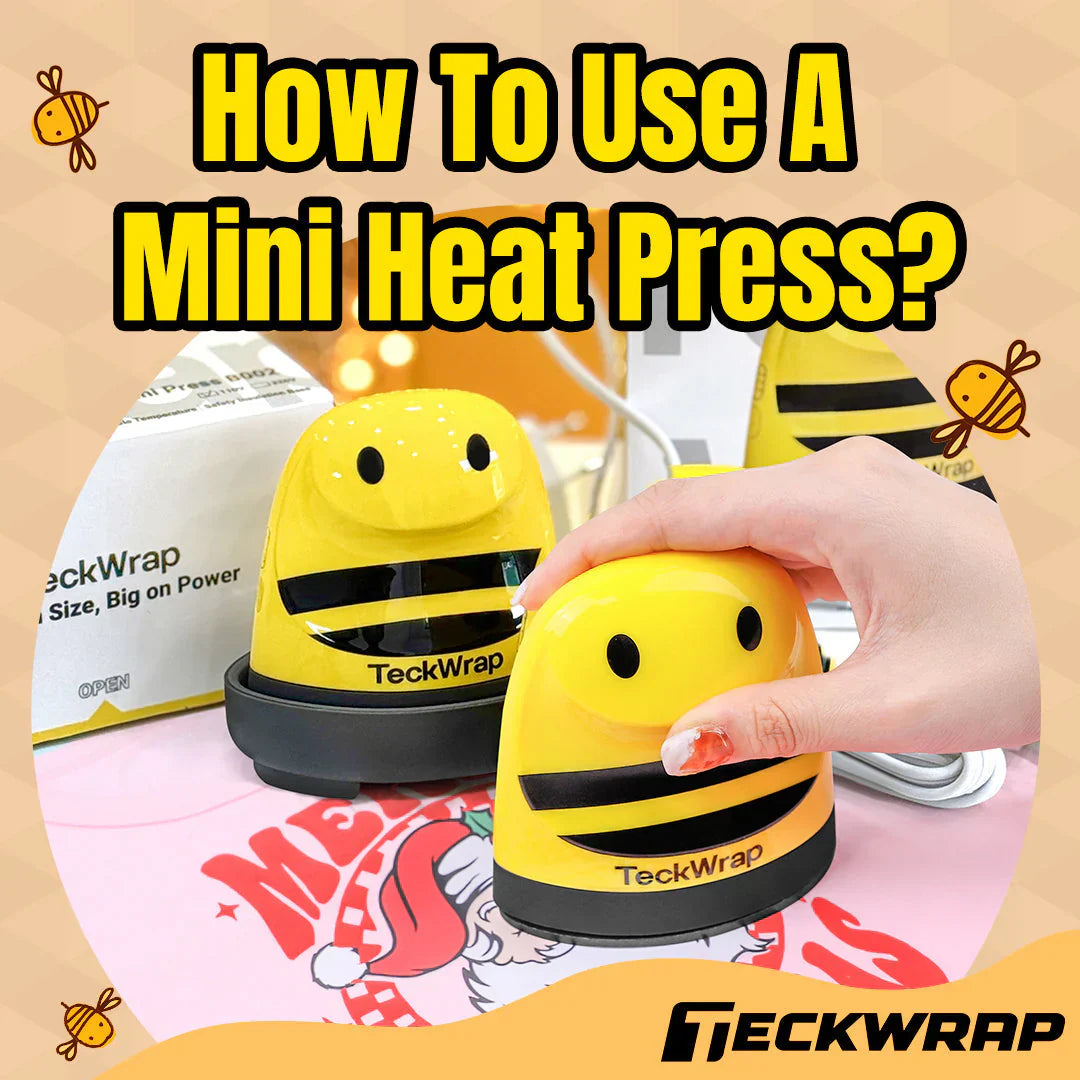
Looking to apply a small HTV design to your favorite T-shirt without investing in a full heat press machine? The Mini Heat Press by TeckWrap Craft is the best option for successfully completing small-scale printing projects. Compact yet powerful, this tool delivers consistent heat and smooth results. It's ideal for detailed patterns, small logos, and quick customizations and is loved by crafters who value convenience and quality. In this blog, we will discuss everything you need to know about the features, usage, and maintenance of the handy Mini Heat Press.
What Is A Mini Heat Press Machine?
A Mini Heat Press is a small, compact, handheld tool designed for applying heat transfer vinyl designs to various compatible fabrics. Unlike traditional heat press machines, it is lightweight and easy to move around, making it ideal for small designs, tight spaces, and curved or hard-to-reach areas. If you are a hobbyist or crafter who wants quick customizations when working on T-shirts, bags, hats, and more, this is the machine for you.
You can get the best Mini Heat Press from TeckWrap Craft. It is portable and lightweight, with a cozy handle for a firm grip. It comes with an insulated safety base that helps protect your workspace. It is available in three variants: 110V (US Plug), 220V (EU Plug), and 220V (UK Plug). You can get three temperature settings on it: 284℉ (140℃), 320℉ (160℃), and 374℉ (190℃). It has a light indicator that signals the heating status. The red light shows it is heating up, and the green light indicates it has reached the desired temperature.

How To Use The Mini Heat Press?
Using a Mini Heat Press is a simple and effective way to apply small heat transfer vinyl designs. The process involves just a few steps, from heating the device to pressing it in place with steady pressure. Following is the step-by-step guide:

Step 1: Gather Your Tools
This is what you will need for a successful project:
- TeckWrap Mini Heat Press Machine.
- Premium TeckWrap heat transfer vinyl in the color and finish of your choice.
- A fabric blank, such as a T-shirt.
- An automated cutting machine, like Cricut.
-
Cutting mat.
- Parchment paper.
-
Weeding tool.
Step 2: Prepare Your Design
Finalize your design on the software compatible with your cutting machine. Set the dimensions according to the space on the blank where you want to print the design. Mirror the image or flip it horizontally. Adjust the material settings. Place a piece of your selected HTV bigger than your design on the cutting mat and insert it in the cutting machine. Weed out the negative vinyl pieces after the design is cut.

Step 3: Press The Fabric
Wash the garment to remove contaminants. This will also remove the risk of shrinkage if the fabric is cotton. Allow it to dry completely, then press it to remove wrinkles and moisture. Place your HTV design on the fabric where you want it to be, with the shiny carrier side facing up. Put parchment paper on top. Now it's ready for heat application.

Step 4: Apply Heat With The Mini Heat Press
Set the Mini Heat Press to the appropriate temperature for the type of vinyl and fabric you’re using. There is a power button on its side. Press it once for low heat, twice for medium, and thrice for high heat, which goes up to 374°F or 190°C. Once heated, press it firmly over the design for about 15 seconds. Apply consistent pressure. If your design is bigger than the base of the press, apply heat in sections. Do not slide the heat press side to side. Lift and place it again to apply heat to the whole design.

Step 5: Remove the Carrier Sheet
After the time is up, let the design cool a bit, then slowly remove the carrier sheet at an angle, keeping it close to the surface. You have successfully transferred the HTV design using the Mini Heat Press.

Tips for Using the Mini Heat Press
To help you get the most out of this compact tool, here are some helpful tips tailored to its unique design and features:

-
Use the Anti-Heat Base for Safety: Always rest the Mini Heat Press on its included anti-heat base when not in use. This keeps your workspace protected and the device stable while hot.
-
Choose the Right Heat Setting: The TeckWrap Craft Mini Heat Press comes with multiple heat levels. Use low for delicate materials like silk, medium for cotton or standard HTV, and high for thicker fabrics or glitter vinyl. Wait for the light to indicate the device is fully heated before use.
-
Give it Time to Heat Evenly: After selecting the heat level, allow the device to heat thoroughly before applying it to the design. It usually takes around 1–2 minutes. Rushing may lead to uneven transfers.
-
Apply Firm Pressure: When transferring a heat transfer vinyl design, make sure to apply firm pressure. Keep your blank on a steady table for this.
-
Grip It Properly: Hold the handle firmly but comfortably. The lightweight, ergonomic design makes it easy to use the Mini Heat Press, especially for detail work and narrow sections.
-
Use on Flat, Stable Surfaces: Even though it's small, it works best when used on a firm, level surface. Avoid padded or uneven ironing boards for more consistent results.
-
Let It Cool Before Storing: After use, switch off the press and allow it to cool completely on its anti-heat base before putting it away. This prevents accidental damage or injury. Thanks to its compact size, the Mini Heat Press fits easily into craft totes or small drawers.
-
Wipe After Each Session: Once cooled, gently wipe the heat plate with a soft, dry microfiber cloth to keep it free of vinyl residue or fabric fibers.
-
It is Best for Small Designs: The Mini Heat Press is perfect for small designs that are covered by its base. With it, you can apply heat exactly where it’s needed. It is ideal for logos, monograms, patches, and designs on tight areas like sleeves, collars, or baby clothes. For large graphics or full-shirt transfers, a standard heat press is more suitable.
-
Pair with TeckWrap Craft HTV for Best Results: The device works seamlessly with TeckWrap Craft's heat transfer vinyl range, designed for reliable adhesion and clean finishes.
Different Uses Of The Mini Heat Press
A premium Mini Heat Press Machine can be used for the following projects:
- Perfect for applying logos, monograms, or small designs to T-shirts, tote bags, and other fabric items.
- You can use it to customize hats, socks, sleeves, pockets, collars, canvas shoes, and other areas where a full-size press won’t fit.
- You can easily attach embroidered patches to clothing with it.
- It is best for safely adding HTV designs to delicate baby outfits, bibs, or pet clothing without damaging the material.
- Excellent for designing fabric coasters, pouches, and pencil cases made of heat-friendly material.
- Portable and convenient for use at craft fairs, workshops, classrooms, or travel-based DIY projects.

Frequently Asked Questions
Q. How to use the Mini Heat Press?
Plug in the device, then set your desired temperature. Press the power button once for low setting, twice for medium, and thrice for high. The three temperatures are 284℉, 320℉, and 374℉, respectively. Red light means the press is heating up. When the light turns green, it means it has reached the desired temperature. Apply heat to your design using firm pressure.
Q. Can you use a Mini Heat Press for shirts?
Yes, you can use a Mini Heat Press for shirts, especially when working with small designs. It’s ideal for adding HTV pattern or lettering to areas like sleeves, pockets, collars, or children's clothing where precision is important.
Q. Can you use a Mini Heat Press for sublimation?
You can use a Mini Heat Press for sublimation if your design is small and fits the size of its heat plate. This is because sublimation requires consistent high heat and firm, even pressure. A full-size heat press is a more reliable option for professional results.
Final Words
If you want to create designs on the go and want a compact and convenient tool, invest in a premium-quality Mini Heat Press. Its lightweight design, easy handling, and reliable heat performance make it an excellent choice for beginners and experienced crafters alike. Visit the TeckWrap Craft online store and get yours today!


